Sizing Images for the Photo Fader Pod on the Portal Page
Images that you use in your Photo Fader Pod need to all be exactly the same size (usually it's 410 x 205 pixels.) This will walk you through how to resize/crop your images down to exactly that right size.
Ok, as we start out here, we're going to assume that you've already reviewed the basic training video for Picnik and are comfortable with the basic sizing and cropping tools as well as how to save a file once you have it properly sized.
What we're going to do here is focus on getting an image sized to exactly 410 pixels wide by 205 pixels tall, which are the dimensions that an image needs to be to display properly in the Photo Fader on the Portal Page.
Why is it so important to get the dimensions exactly right? It's simple. If you have images with different dimensions, then as your Photo Fader pod goes from one image to the next, you'll have portions of the previous image left over, and it generally doesn't look good. Also, if your image isn't proportional to 410 x 205 pixels (i.e., a 2 x 1 ratio), the Magnet system will try to resize the image to fit the 2 x 1 ratio, and the result will look distorted.
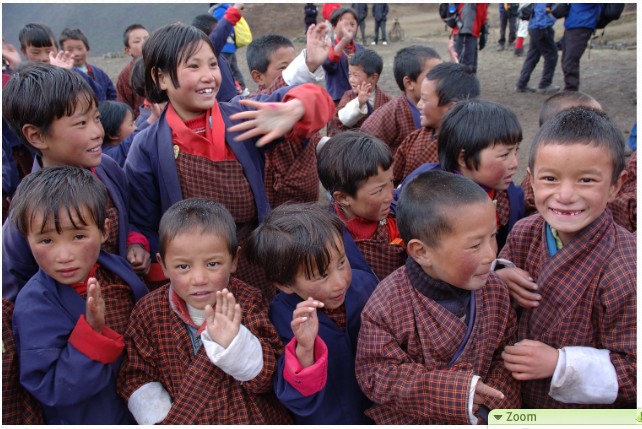 Let's look for a moment at what happens when we upload an image and it's not sized properly. Here's the image as it starts off looking. (The kids--students at a boarding school in the Lingzhi Valley in Bhutan--were clearly happy to have us as visitors that day!) Let's look for a moment at what happens when we upload an image and it's not sized properly. Here's the image as it starts off looking. (The kids--students at a boarding school in the Lingzhi Valley in Bhutan--were clearly happy to have us as visitors that day!)
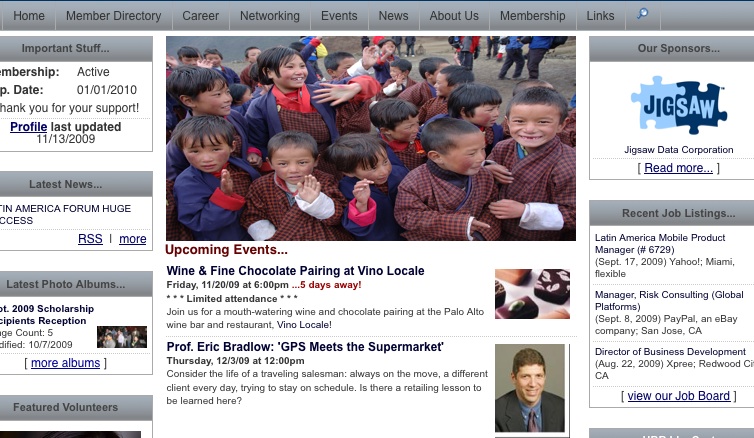 If we upload it as is, the Magnet system will automatically resize the image to make it fit. BUT, as you can see, the image gets distorted/squeezed down to make it fit in a 410 x 205 pixel window. If we upload it as is, the Magnet system will automatically resize the image to make it fit. BUT, as you can see, the image gets distorted/squeezed down to make it fit in a 410 x 205 pixel window.
Not good.
 Ok, so how do we get this image to be the right size? Ok, so how do we get this image to be the right size?
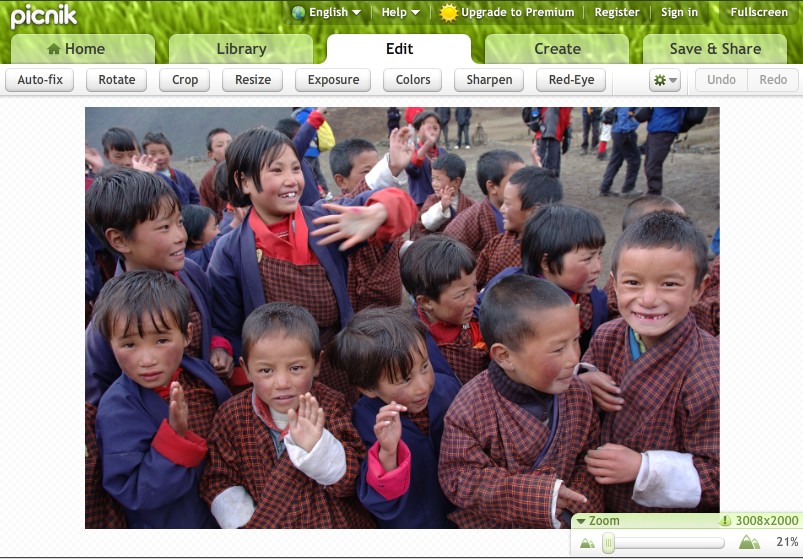
Well, first off, notice in the bottom right-hand corner of the image to the right, we have a fairly large image we're working with. This one is 3008 x 2000 pixels and started off as a 2.9MB file. That's large--much larger than we want to end up with.
So the first thing we're going to do is use the "Resize" tab under the "Edit" menu in Picnik.
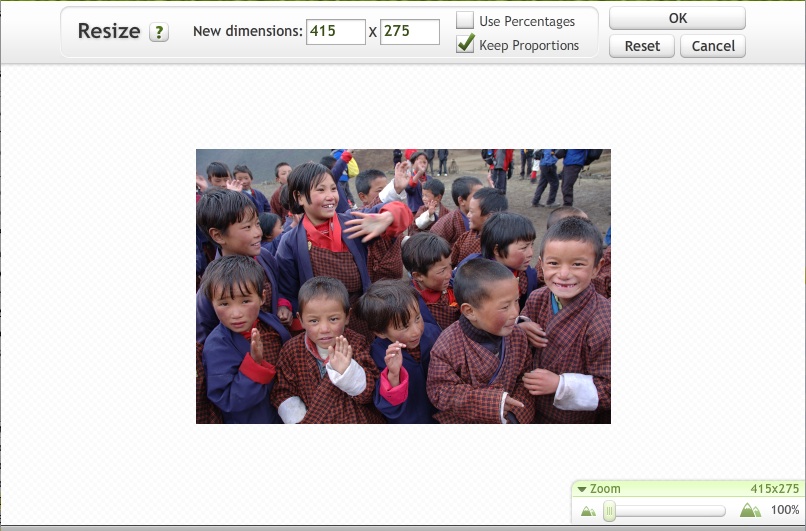 Let's keep in mind here that we're going to want to end up with an image that is 410 pixels wide by 205 pixels tall. Let's keep in mind here that we're going to want to end up with an image that is 410 pixels wide by 205 pixels tall.
Looking at the image we're starting with, it seems like we'll probably want most of the width of this image in the final image. Some photos you may want to crop a lot more out of, but not this one. So let's change the width of the image to, say, 415 pixels. As long as we have the "Keep Proportions" checkbox checked in Picnik, it will automatically set the width for us to 275 pixels.
Then we just click the "OK" button to save our changes.
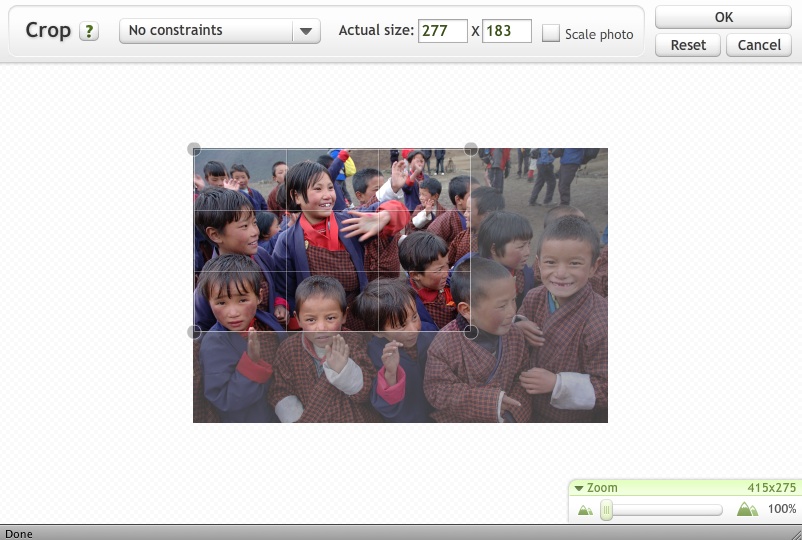 Now comes the fun part. We need to CROP this image to make it 410 x 205 pixels. So within the "Edit" tab in Picnik, we click the "Crop" button. It starts us off with a grid in the middle of the image. We can drag this grid, and we can resize it. Now comes the fun part. We need to CROP this image to make it 410 x 205 pixels. So within the "Edit" tab in Picnik, we click the "Crop" button. It starts us off with a grid in the middle of the image. We can drag this grid, and we can resize it.
There are two ways to resize the grid. The first is to just drag one of the corners in or out to whatever size you want. The other way is to just type in the dimensions into the fields just above the image. Important note: If you're going to type in dimensions that are roughly the same size as the overall image, first drag the crop box to the upper left corner of the image. That will give you enough space for the box to expand down and to the right.
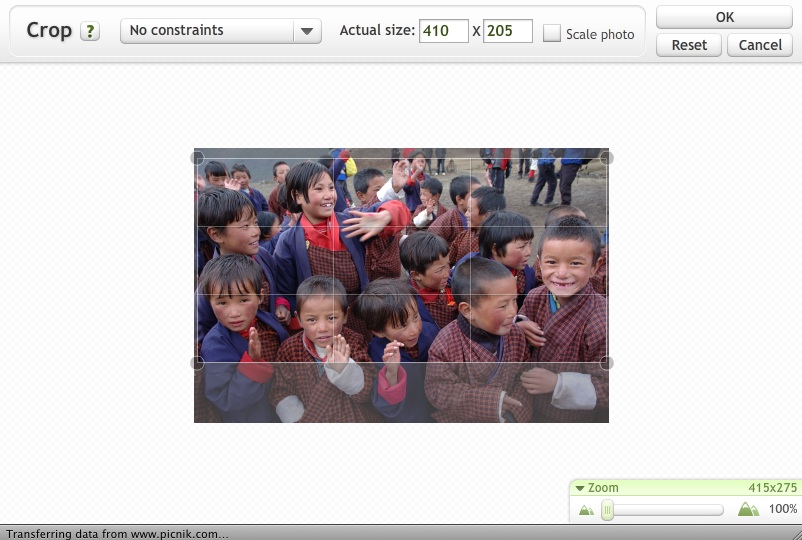 We've now got a crop box that is 410 x 205 pixels. As expected, it takes up almost all of the width of our image (which is now only 415 pixels wide.) We've now got a crop box that is 410 x 205 pixels. As expected, it takes up almost all of the width of our image (which is now only 415 pixels wide.)
We've dragged the crop box down a little bit from the top, but you can see that since we have only 205 pixels of height that we can end up with, we're going to have to decide whether we lose some pixels from the top of our original 275 pixels of height we had in the image or whether we take it from the bottom of the image. For this one, let's crop most of our 70 pixels (275 minus 205) from the bottom of the image.
Now just click the "OK" button, and . . .
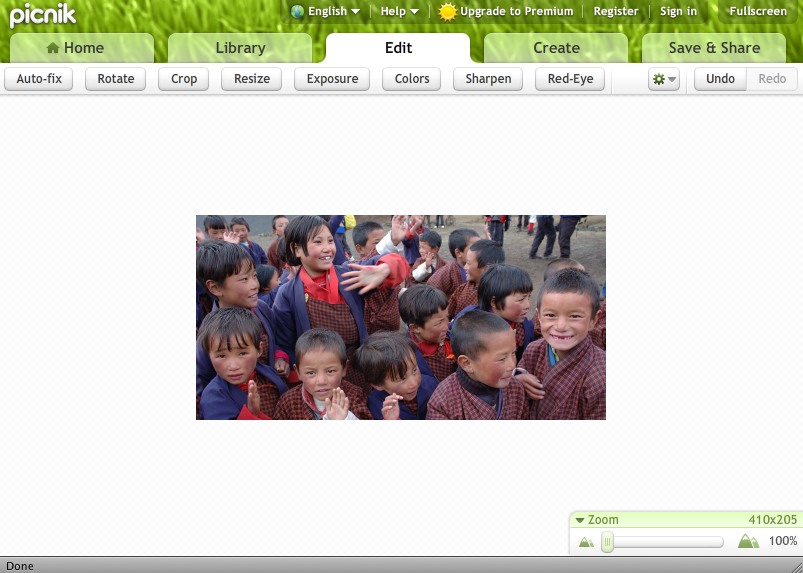 . . . we have our final image, which is exactly 410 x 205 pixels. . . . we have our final image, which is exactly 410 x 205 pixels.
Now it's just a matter of saving the image file, which is the same process as we described in the earlier Picnik training video.
|